磕磕绊绊地搭建好了博客,也进行了一翻装修。大部分都是站在前人的肩膀上进行调整,重复的部分就不赘述了,主要记录自己个性化和饶了点弯路的地方。主要参考的博文如下:
不喜欢 hover 时的样式,在assets/scss/style.scss里修改样式:
1
2
3
4
5
6
7
8
|
a {
  &.link {
        border-bottom: solid 1px var(--accent-color);
        transition: all 3s;

        &:hover {
            opacity: 0.8;
}
|
 1
 2
 3
 4
 5
 6
 7
 8
 9
10
|
@media (min-width: 768px) {
  .menu li {
    padding-left: 20px;
  }
}
@media (min-width: 768px) {
  #dark-mode-toggle {
    padding-left: 0; //dark mode栏还是保持原样
  }
}
|
屏宽小于一定值的时候文章目录就不显示了,手动在文章前添加折叠目录。
在layouts/partials/article/components中添加toc.html,内容如下:
 1
 2
 3
 4
 5
 6
 7
 8
 9
10
11
12
13
|
{{ if (.Scratch.Get "hasTOC") }}
<section class="widget toc">
  <h2
    class="widget-title section-title"
    onclick="document.all.collapse.style.display=(document.all.collapse.style.display =='none')?'':'none'"
  >
    {{ T "article.tableOfContents" }}
  </h2>
  <div class="widget--toc" id="collapse" style="display: none">
    {{ .TableOfContents }}
  </div>
</section>
{{ end }}
|
在layouts/partials/article/article.html中引入目录:
1
2
3
|
{{ partial "article/components/header" . }}
<!--在此处引入如下内容-->
{{ partial "article/components/toc" . }}
|
在assets/scss/style.scss里添加样式样式:
 1
 2
 3
 4
 5
 6
 7
 8
 9
10
11
12
13
14
15
16
17
18
19
20
21
|
.main-article .toc {
  padding: var(--card-padding); //和文章内间距保持一致
  padding-bottom: 0px;
}

.main-article .widget--toc {
  margin-left: calc((var(--card-padding)) * -1);
  margin-right: calc((var(--card-padding)) * -1);
  border-radius: 0;
  box-shadow: none;
  background-color: var(--blockquote-background-color);
} //按照代码块、引用设置的样式

.main-article .toc h2:hover {
  cursor: pointer;
}
@media (min-width: 1280px) {
  .main-article .toc {
    display: none; //大屏时隐藏
  }
}
|
在config.yaml中设置:
 1
 2
 3
 4
 5
 6
 7
 8
 9
10
11
12
13
|
markup:
  highlight:
    anchorLineNos: false
    codeFences: true
    guessSyntax: false
    hl_Lines: ""
    lineAnchors: ""
    lineNoStart: 1
    lineNos: false
    lineNumbersInTable: false
    noClasses: true
    style: monokailight
    tabWidth: 4
|
hugo 官方文档给出了代码高亮的默认设置和参数解释,样式可以在这里挑选。
Hugo 代码高亮这篇文章中给出了有关代码高亮的一些语法,例如自定义开始行号、高亮某一行。
只有标记了语言才能显示高亮,like
```python
print("hello world")
```
因为 stack 主题自身代码块的文字颜色是白色,所有选择浅背景的高亮 style 是就会有代码或者花括号看不清,所以也在custom.scss里修改了样式:
1
2
3
4
|
.article-content pre {
  background-color: #fafafa;
  color: #3d3d3d;
}
|
按照Hugo Stack 主題修改記錄 (瘦身篇)处理,但不知道为什么注释掉会报错,DELETE 掉就是正常的,也许是哪里引入的问题。
stack 主题中文章标题是<h2>,markdown 从##开始写也是<h2>,有点强迫症,把文章标题改成<h1>。还有文章的 description 用的是<h3>,觉得有点莫名其妙,也修改成了<p>。然后调整了 <h1>~<h6> 的字体大小。
在layouts/partials/article/components/details.html中修改大标题:
1
2
3
4
5
6
7
|
<!--h2 改成 h1 -->
<h1 class="article-title">
  <a href="{{ .RelPermalink }}"> {{- .Title -}} </a>
</h1>
<!-- h3 改成 p -->
<p class="article-subtitle">{{ . }}</p>
{{ end }}
|
在custom.scss中:
 1
 2
 3
 4
 5
 6
 7
 8
 9
10
11
12
13
14
15
16
17
18
19
20
|
.article-title {
  font-size: 2.1rem;
}
.article-subtitle {
  font-size: 1.6rem;
  line-height: 1.85;
}
.article-content h2 {
  font-size: 2rem;
}
.article-content h3 {
  font-size: 1.8rem;
}
.article-content h4 {
  font-size: 1.7rem;
}
.article-content h5,
.article-content h6 {
  font-size: 1.6rem;
}
|
满足我个人的小私心,总觉得有邮件订阅才像是一个博客()
用的是follow.it,按照指引一步步做就好了,非常简单方便。
又是比较个人的地方,不喜欢 label 标签也在框内,而且 placeholder 的文字“type something”看起来很丑......(就是 ypg 这种占了下两个的字母)
在layouts/page/search.html和layouts/partials/widget/search.html中整个删掉 label 标签。
1
2
|
<label>{{ T "search.title" }}</label
><!--删掉这行-->
|
在i18n/en.yaml中修改 placeholder 文字:
1
2
3
|
search:
  placeholder:
    other: Search
|
调整样式,修改内间距和 placeholder 文字颜色,在custom.scss中:
 1
 2
 3
 4
 5
 6
 7
 8
 9
10
11
12
13
14
15
16
17
18
|
.search-form input {
  padding-top: 20px;
}
input::-webkit-input-placeholder {
  color: #d9d9d9;
}
input::-moz-placeholder {
  /* Mozilla Firefox 19+ */
  color: #d9d9d9;
}
input:-moz-placeholder {
  /* Mozilla Firefox 4 to 18 */
  color: #d9d9d9;
}
input:-ms-input-placeholder {
  /* Internet Explorer 10-11 */
  color: #d9d9d9;
}
|
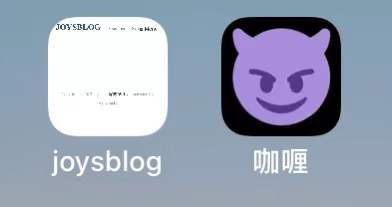
apple-touch-icon 简单来说就是苹果系统 safari 将网站添加到主屏幕时显示的图标。因为我喜欢把自己的博客添加到主屏幕上,没有这个 icon 设置就只有简陋的页面截图。

只需要在layouts/_default/baseof.html的<head></head>中添加以下代码即可。图标存放在static/img 之中。
1
|
<link rel="apple-touch-icon" sizes="180x180" href="/img/apple-touch-icon.png" />
|
apple-touch-icon 支持 size 属性,可以对应不同的设备,例如手机、平板,但我懒得去准备不同尺寸的图标了。
比起每次都要写 description 我更喜欢采用“阅读更多”的方式,看了一下 Hugo 自身也支持“阅读更多”,通过使用.Summary 变量,生成内容摘要。默认摘要是文章内容的前 70 个单词(字数可以在配置文件中修改),也可以通过在文章中手动拆分。需要注意的地方是要识别中文字数需要在配置文件中将hasCJKLanguage设置成true。而且似乎自动识别的摘要是不带格式的(? 总之我更倾向于手动拆分。
更具体地请见官方文档。
在 stack 主题中添加 readmore 的位置我找了半天(意外收获就是把主题结构给摸得差不多清楚了),最终加在了layouts/partials/article-list/default.html中:
 1
 2
 3
 4
 5
 6
 7
 8
 9
10
|
{{ partial "article/components/header" . }}
<!--在此处添加以下代码-->
<div class="article-content">
  {{ .Summary }} {{ if .Truncated }}
  <!-- This <div> includes a read more link, but only if the summary is truncated... -->
  <div class="read-more">
    <a href="{{ .RelPermalink }}">» READ MORE</a>
  </div>
</div>
{{ end }}
|
